
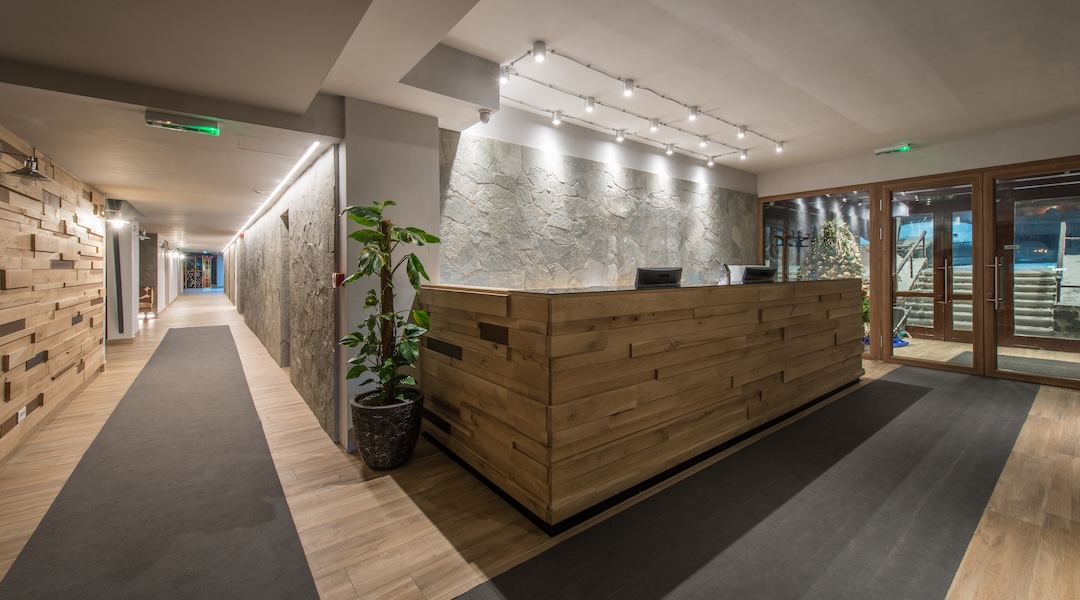
Reception Stations and Lobby Furniture: Planning the First Impression
A reception area is the first test of a company’s brand and operations. This guide helps interior designers, architects, and office managers choose a reception station layout, check accessible counter clearances, plan storage and cabling, and set waiting seating and visitor paths before ordering.
Post Summary
Map the entrance, check-in point, and waiting area first, then compare straight and L-shaped stations by footprint and usable work surface. Drawers are a storage option, not a layout type, so confirm the return direction on the drawing and check the delivery path and door swings before ordering.
Under the 2010 ADA Standards, a sales or service counter needs a portion at least 36 inches long and no more than 36 inches high for a parallel approach, or at least 30 inches long with knee and toe space for a forward approach. Work surfaces sit 28 to 34 inches high. Have an accessibility reviewer confirm how this applies to your check-in counter and check Massachusetts and local requirements.
List every device first, plan power, data, and cable routes before installation, and place grommets beside equipment. Route cables through under-desk trays or concealed raceways, keep them out of legroom, and plan lockable storage for confidential files and keys.
Choose finishes that suit cleaning routines and expected wear, and check the care requirements of the selected product. Coordinate colors, textures, signage, and logo placement across the desk and lobby, and approve shop drawings before production on custom pieces.
Make reception easy to spot from the entrance and keep the route from the door to check-in direct and clear. Plan enough seats for peak arrivals, place them far enough from check-in for private conversations, and keep screens from blocking staff sightlines.
We start reception planning with people and tasks - not finishes. Map the entrance, check-in point, and waiting area first. Then compare straight and L-shaped stations, keeping storage, equipment, privacy, and visitor paths in mind.
Here’s what we check before ordering:
- Fit and access: Desk dimensions, return direction, delivery access, and accessible counter space. A parallel-approach counter section must be at least 36 inches long and no more than 36 inches high under the cited ADA standards.
- Daily use: Drawers, locks, power, data, and cable routes that leave staff room to work.
- The waiting area: Enough seats for peak arrivals, clear paths, and space for private conversations.
- The final order: Finishes, signage, included parts, installation costs, and delivery dates.
For Greater Boston projects, we also have an accessibility reviewer check Massachusetts and local requirements. Our rule: check the measured plan before buying.
How to Design a Stunning Office Reception
Choose a Reception Station Layout
Once you’ve defined the reception tasks, choose a station shape that fits the room and workflow. Compare stations by overall footprint and usable work surface. Drawers are a storage option, not a layout type.
Compare Straight and L-Shaped Stations
A straight station works well for compact layouts and short check-ins. An L-shaped station adds a separate work zone for screens, phones, printers, and paperwork. Confirm the left-hand or right-hand return orientation on the drawing - don’t rely on the product photo.
Once you’ve chosen the layout, verify the installation path and hardware package. Check the proposed footprint, door swings, visitor approach, delivery path, entrance openings, and tight turns.
Check Drawers and Purchase Details
Drawers affect storage and legroom, not the base configuration. Position them so staff can reach supplies without losing legroom or ADA-compliant knee clearance. Before buying, get written confirmation of what’s included, such as the transaction hutch, drawer pedestals, locks, and installation hardware.
For tight timelines, OGI Quick Turnaround reception stations use standardized configurations.
Buying a used reception station? Verify dimensions, condition, locks, missing parts, cable access, and total installed cost. Inspect wear, test every drawer, confirm the supplied keys, and check all hardware and power and data routes.
With the layout set, move to transaction heights and clearances.
Check Accessible Counters and Clearances

Once you’ve selected the station shape, check the transaction counter clearances. With the layout set, classify the counter by use, not product name. Under the 2010 ADA Standards, check-in and visitor-assistance counters follow Section 904.4. Writing and work surfaces follow Section 902, which sets their height at 28 to 34 inches. 1
Plan Parallel and Forward Counter Approaches
For a parallel approach, provide an accessible counter portion at least 36 inches long and no more than 36 inches high. For a forward approach, provide at least 30 inches of counter length at no more than 36 inches high, with knee and toe space underneath. Put the accessible section where visitors naturally approach the desk. 1
Check Floor Space and Accessible Routes
Allow 30 by 48 inches of clear floor space and keep the route accessible. Keep seating, queues, and door swings out of the approach path. 2 3
Have the project architect or accessibility specialist check Massachusetts requirements, including applicable 521 CMR provisions, along with local requirements. Don’t rely on an ADA product label.
Once the clearance plan is set, specify storage, technology, and cable management.
Specify Storage, Technology, and Finishes
Plan Storage and Cable Management
Once clearances are set, size the desk to fit its equipment. Plan storage around daily tasks: badges, mail, forms, keys, personal items, and confidential files. Provide lockable storage for confidential files and keys. [5][7]
Map out monitors, phones, printers, check-in tablets, and chargers before placing power and data connections. Set aside space for badge printers, and keep screens and paperwork on the staff side. [2][6]
Place grommets beside equipment, then route cords through under-desk trays or concealed raceways. Keep cables clear of legroom and staff walkways. [3][6] Make sure staff can access power connections for service without removing panels or hardware. [6]
Choose Materials and Branding Details
Choose finishes that suit cleaning routines and expected wear. Laminate works well for busy reception stations, but check the selected product’s care requirements before approval. Review durability at exposed corners and transaction edges, too. [2][6]
Branding goes beyond the logo. Coordinate colors, textures, signage, and logo placement across the desk and lobby, with wayfinding and daily use in mind. Use the reception branding guide to align these details. [2][3]
Next, map the visitor path and waiting seats around the finished desk.
Plan Waiting Seating and Visitor Paths
With the desk selected, plan the public area around it, including visitor routes, seating, and privacy.
Keep the Entrance-to-Reception Path Clear
Make reception easy to spot from the entrance, and position staff so they can see visitors arrive. Keep the route direct and clear from the entrance to check-in and onward destinations. Place seating, tables, and planters outside that path. [1][3]
Test the layout with doors open, and leave a 60-inch turning diameter clear in front of the accessible section. Screens or acoustic panels can separate waiting areas from check-in, but they shouldn't block staff sightlines. [3][4]
Match Waiting Furniture to Visitor Needs
Plan enough seats for peak arrivals, using wait times and visitor turnover to determine the count. For longer waits, provide side tables and charging access. [5][6]
Place seating far enough from check-in to allow private conversations. Mix individual chairs with small-group seating, and leave space for mobility devices without blocking the visitor route. [1][4][6]
Use OGI’s reception seating guide to review seat height, armrests, durability, and maintenance. [2][8]
Once seating and visitor routes are set, check the full plan against the checklist.
Complete the Reception Planning Checklist
With the layout, clearances, storage, finishes, and seating set, use this checklist to finalize your order.
- Workflow sign-off: Ask reception staff to review greeting visitors, handling calls, running security checks, and receiving packages. Before approval, check the measured plan for returns, door swings, columns, and staff working space. [6][9]
- Accessibility, storage, and technology: Confirm final counter dimensions with the accessibility reviewer. Before production, approve custom shop drawings that show dimensions, storage, power and data locations, cable routes, and grommet placement. [6][3]
- Furniture counts, finishes, and delivery logistics: Confirm final quantities and finishes, plus total freight, installation, and site-work costs. Check dock access, elevator size, lift-gate needs, Certificate of Insurance (COI) requirements, and installation dates. Complete power and data work before delivery. [6][3]
Use this review to check that the reception station fits your brand and supports daily work.
Review Your Reception Plan With OGI
Bring your final measured plan, equipment list, finish preferences, budget, and installation timeline to OGI for an order review. Greater Boston businesses can review space planning, furniture selection, and project coordination together - and identify any open decisions before ordering.
Contact OGI to discuss reception planning.
Call 781-762-3733.
Email info@officegallery.net.
Visit 151 Carnegie Row, Norwood, MA.
FAQs
Can I retrofit a used reception desk for accessibility?
Retrofitting a used reception desk usually isn’t worth it. It often costs more than buying a desk built for compliance, and the finishes often don’t match. Plan for accessibility when you first specify the desk.
For ADA compliance, a service counter must include a section no higher than 36 inches, with dimensions based on the approach:
- Parallel approach: At least 36 inches long.
- Forward approach: At least 30 inches long, with knee and toe clearance.
How do I size reception stations for multiple staff?
For two or more staff members, consider an L-shaped or U-shaped reception station. These layouts provide enough work surface while keeping task areas separate from visitor interaction zones.
Allow at least 36 inches of clear passage behind the desk so staff can move around. Each person needs a workstation depth of 24 to 30 inches for screens and equipment. Include an accessible counter section no higher than 36 inches: at least 36 inches long for a parallel approach, or at least 30 inches long with knee and toe space for a forward approach.
What hidden costs should my reception furniture budget cover?
The reception station’s sticker price is only part of the budget. Plan for accessibility compliance, floor leveling, power and data connections, acoustic treatments, and professional layout planning. Set aside funds for interior branding and dedicated lighting for both the counter and logo wall, too.
Budgeting for these items early helps avoid costly retrofits, failed inspections, and layout conflicts.
Contact us to discuss your project requirements: 781-762-3733, info@officegallery.net, 151 Carnegie Row, Norwood.
•••••
The right workplace design measurably improves employee performance, satisfaction, and retention. Office Gallery partners with businesses on that strategy, and welcomes architects and interior designers looking for a furniture and space-planning partner on their own projects. Contact the team at 781-762-3733, email info@officegallery.net, or visit the showroom at 151 Carnegie Row in Norwood.
Key Points
How do you choose a reception station layout?
- Start with tasks: Map the entrance, check-in point, and waiting area first, then compare station shapes by overall footprint and usable work surface.
- Straight stations: A straight station suits compact layouts and short check-ins.
- L-shaped stations: An L-shaped station adds a separate work zone for screens, phones, printers, and paperwork.
- Return orientation: Confirm the left-hand or right-hand return on the drawing instead of relying on the product photo.
- Drawers: Drawers are a storage option, not a layout type, and they affect storage and legroom rather than the base configuration.
- Quick Turnaround options: Office Gallery’s Quick Turnaround reception stations page lists three configurations: Reception Station, Reception Station with Drawers, and L Configuration Reception Station. It says current availability and lead times are confirmed with the team.[1]
What do ADA counter standards require at a reception station?
- Know the section: Section 904.4 of the 2010 ADA Standards covers sales and service counters.[2] Ask your accessibility reviewer whether it applies to your check-in or visitor-assistance counter.
- Parallel approach: The standard calls for a counter portion at least 36 inches long and no more than 36 inches high.[2]
- Forward approach: The counter portion must be at least 30 inches long and no more than 36 inches high, with knee and toe space underneath.[2]
- Work surfaces: Section 902 sets the tops of work surfaces at 28 to 34 inches above the floor.[2]
- Clear floor space: Section 305 calls for clear floor space of at least 30 by 48 inches.[3]
- Massachusetts and local rules: Have the project architect or accessibility specialist check Massachusetts requirements, including 521 CMR, the Architectural Access Board’s regulations,[4] along with local requirements. Do not rely on an ADA product label.
How do you plan storage, power, and cable management for a reception station?
- List devices first: One dealer guide says to list each device first, naming monitors, phones, label printers, chargers, and badge or access devices.[5]
- Plan before installation: Another guide says to plan power access, device placement, and cable routes before installation.[6]
- Cable routes: Place grommets beside equipment and route cords through under-desk trays or concealed raceways, keeping cables clear of legroom and staff walkways. The dealer guide lists cable trays or concealed raceways and integrated grommets among its options.[5]
- Service access: The same guide says staff should be able to reach power and data without disassembling half the desk.[5]
- Daily storage: Plan storage around badges, mail, forms, keys, personal items, and confidential files, with lockable storage for confidential files and keys.
- Privacy at the desk: Keep screens and paperwork on the staff side. One guide lists privacy for documents or screens among its reception desk considerations.[6]
How do you choose reception desk finishes and branding?
- Cleaning and wear: Choose finishes that suit your cleaning routines and expected wear, and review durability at exposed corners and transaction edges.
- Laminate: One dealer calls laminate the practical baseline for most projects,[5] and another lists laminate finishes for durability and easy maintenance.[6] Check the selected product’s care requirements before approval.
- Corners: The dealer guide warns that a desk can still fail at the corners six months later without impact-resistant edges.[5]
- Branding beyond the logo: Coordinate colors, textures, signage, and logo placement across the desk and lobby, with wayfinding and daily use in mind.
- Brand checklist: One guide’s brand fit checklist covers colors, finishes, and logo placement.[6]
- Shop drawings and samples: One buyer’s guide says to ask for shop drawings before any deposit clears, with CAD approval, material sample sign-off, and pre-production review for units above its catalog tier.[7]
How do you plan waiting seating and visitor paths?
- Easy to spot: Make reception easy to see from the entrance and position staff so they can see visitors arrive. One reception fit-out guide says the desk should be visible and should guide visitors without interrupting circulation.[8]
- Keep the route clear: Keep the route direct from the entrance to check-in and onward destinations, with seating, tables, and planters outside that path.
- Turning space: The 2010 ADA Standards allow turning space as a 60-inch diameter circle or a T-shaped space within a 60-inch square.[3]
- Seat count and charging: Plan enough seats for peak arrivals, using wait times and visitor turnover, and add side tables and charging access for longer waits. One fit-out guide lists power sockets or charging points for waiting areas.[9]
- Private conversations: Place seating far enough from check-in to allow private conversations. The reception fit-out guide lists distance from the desk and privacy as seating considerations.[8]
- Screens and sightlines: One furniture guide suggests an upholstered screen or partition between the waiting area and the working position to manage noise.[10] Make sure screens and acoustic panels do not block staff sightlines.
What should you confirm before ordering reception furniture?
- Workflow sign-off: Ask reception staff to review greeting visitors, handling calls, running security checks, and receiving packages. One dealer guide says reception staff often spot practical problems a purchasing team will not catch from a plan alone.[5]
- Check the room: The same guide says a measured drawing on paper is not enough if columns, wall bases, or door swings were not checked on site.[5]
- Shop drawings: Before production, approve custom shop drawings that show dimensions, storage, power and data locations, cable routes, and grommet placement. The dealer says to confirm dimensions before approving a shop drawing or placing an order.[5]
- Total cost: Confirm final quantities and finishes. The dealer guide says quotes should cover freight, installation, and any site work needed to bring power and data.[5]
- Delivery logistics: Check dock access, elevator size, lift-gate needs, certificate of insurance requirements, and installation dates. The same guide mentions lift-gate delivery, clear loading dock access, elevator use, and certificate requirements.[5]
- Power and data first: Complete power and data work before delivery, since a desk can arrive before the electrical work is done.[5]